
Photos on Instagram have to be appealing! Can we all agree this statement has to be true? But many of us might not know how to get a decent Instagram photo using our phone.
Learning how to take good Instagram photos with your phone needs some understanding of basic principles. Such as composition, lighting, and most importantly training your eye to capture the right moment.
Moreover, we know the holiday season is a peak time for capturing joyful moments. What’s a better time to applying these steps we’re about share with you than now.
Why Do Good Instagram Photo Matter?
You might wonder does the quality of my photos makes a difference. Aside from getting those double taps, Instagram is a visual platform. To pull the audience your content has to be visually worthy. Amazing photos will get your audience to champion your brand for you. which will translate to more engagement. Moreover, it was proven Instagram algorithm rewards posts that have higher engagement. Thus giving you a chance for wider exposure, and your Instagram photos might even land on the explorer page. Furthermore, an appealing Instagram photo is a viable strategy for your Instagram marketing.
With that said, be critical about your content, does it align with your brand voice and style? Do you want something bold and colorful? Or Edgy and urban?
We combined our knowledge to present to you key steps that will certainly add value to your Instagram photo-taking skills. But don’t change careers yet!
STEP 1: Don’t Miss Out on Natural Light
Natural light can elevate your photos. This simple step can make any novice photographer seem like a veteran and the foundation of any great photo is utilizing the surrounding light.
Using flash can dull your photos and flatten them out. If you are planning to take Instagram photos indoors, do so near a window or in a room with good lighting.
Not all photos are taking in the daytime, we get it, therefore seek ambient light like street lamps and store windows. Our advice is, don’t hang too long in front of your local 7/11 window, you might get unwanted stares.
Understanding how lighting adds magic to your pictures is pivotal. To upgrade your photography game. Another idea you can try is taking photos at dawn the soft shadows and light contrast will give you unmatched results. Furthermore, the golden hour, when the sun is low on the horizon. It has similar magic, and you could skip the editing phase altogether. Some might even prefer cloudy days to direct sun. Because direct sun might give you too much light, whereas cloudy days will give you better portrait photos. Also, on cloudy days you won’t have to worry about which direction your subject or object is facing. Also, the clouds will diffuse the direct sunlight which may harshen your photos.
STEP 2: Avoid Overexposing Your Instagram Photo
You can brighten a dark photo, but no amount of editing can salvage an overexposed Instagram photo. You can easily avoid overexposing your photos by sliding your finger up or down on your phone screen. Another method to adjust exposure automatically is by tapping on the brightest frame on your phone before snapping a photo.
As a rule, it is better to have an underexposed Instagram photo, you can adjust with editing tools rather than overexposing your photos.
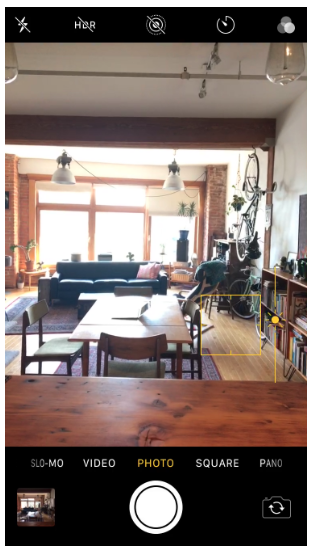
STEP 3: HDR Mode Is Overrated
HDR (High Dynamic Range) mode works by taking photos at several exposure levels at once. Then putting it all together for a detailed shot. A professional photographer will know best how to work this function. However, for the average phone user, they will not be able to harness this mode for the best outcome.

STEP 4: Use The Rule Of Thirds
Apart from natural light, photo composition is another key pillar in making great photos. Composing a photo comes down to how you arrange the photo while considering the shapes, texture, colors, and other elements that are incorporated in your picture.
You might have heard of “the Rule of Third” before. It’s simply one of the popular composition principles, which aims to balance your photo by framing it in a 3×3 grid. Then align the subject or object along the grid lines to create an aesthetic balance.
You can also achieve satisfying results with balanced asymmetry. Where the subject is off-center but balanced by another object. Many smartphones have a grid feature that will help you compose your shots. For iPhone users their phone offers this feature, you can enable it by going to your phone’s setting then camera setting, and enable it. The grid overlay should be visible in your camera thereafter.
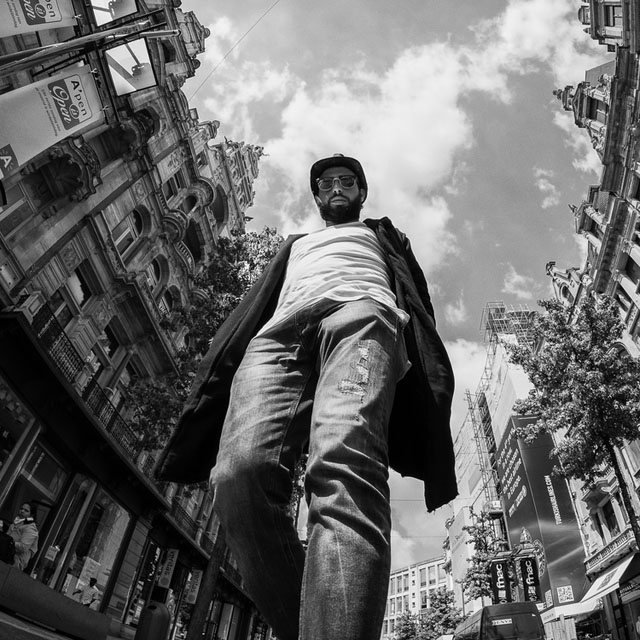
 STEP 5: Consider Other Viewpoints
Your eyes may not be a mechanical device that can do burst shots, but a trained eye can identify a moment worth capturing. “They have an eye for it” this phrase sums up the essence of viewpoint. Most people when they taking a photo they hold the camera to their eye level, which is fine. However, have you considered the type of shots you might have snapped if you crouched? Or took an Instagram photo from an above angle?
Use your eye muscle to find an interesting viewpoint, and remember the camera is only a tool to capture what the eyes see.
STEP 6: Frame First, Then Snap!
Look through the screen of your phone instead of looking at it. That’s farming in a nutshell. Certain shots will look better if you zoom out and try to capture all that’s happening in a single shot. You might capture an unplanned detail that will enhance your photo.
Your phone is different from a Pro camera that has several lenses at its disposal. The moment you zoom in on an object you are pre-cropping your photo. Try to avoid that, and instead tap your phone screen to focus on your focal point.
STEP 7: Draw The Viewer’s Eye (Leading Lines)
“Leading lines” remember this term! Photo composition has several principles, leading lines is one of those principles you can adapt. It’s mainly used to draw the viewers’ attention to a single point. Peoples’ eyes are naturally drawn to lines whether it’s vertical, horizontal, or parallel. This technique will help you add motion to your frame.

STEP 8: Create Depth
A photo with depth will emit warmth and will engage with the viewer’s senses. At certain times when taking photos of a far or med distant object it may appear as flat, but adding another object to the frame at a different distance will create layers. Thus, those layers will create depth.
Placing objects on a different dimension in your frame is what creates layers.
Once you pick up your phone to take a photo, resist the habit of holding your phone at eye level, or vertically, the horizontal frame will more likely elevate your photo and add that much-needed depth.
STEP 9: Use real people, your employees
Whether your brand is in the B2C or B2B industry. Constantly posting content promoting your product or services on Instagram may annoy your audience. Showing real people like your staff will give your brand a humanized feel to it, and studies suggest it is 38% more likely to receive likes. Therefore your audience is more likely to relate to your content.
Moreover, for B2B it’s pivotal to leverage on building a brand personality. Because more often than not their services are not tangible, so how can you keep your audience interested in your content?

STEP 10: It’s Okay To Use Edit Tools
Applying simple editing tweaks will elevate your Instagram photo, and crucial if your business is in retail, fashion, or food. Editing should be at the top of your priority.
The quality of the photos influences brand credibility from a marketing perspective.
However, be wary of editing too much. It will rob the natural feel of your Instagram photos. Fixating on over-the-board editing can be time-consuming and a burden on your marketing budget.
There are a variety of editing tools to serve your needs, and you can download them on your phone. Explore them:

Don’t limit your options to the editing tools provided by Instagram. All those editing apps are worth checking.
We are in an era your virtual presence in social media and the quality of content you are providing, has to be as good as your actual services and products. Therefore, any extra little effort you make for your brand to stand out from the competition will go a long way.
Especially on Instagram, think about how can your business better your audience’s visual experience? We hope we provided some ideas that will get you started. Or you can throw all that burden on us. Whereby we will schedule, engage your audience, and publish your photos directly to Instagram. Start with our free Instagram brand audit.
Share with us in the comments what other tips you use to take amazing pictures.
 Linkedin